Everything You Should Know About Cultivating Your Own Sourdough Starter

This guide provides everything you need to know about creating, feeding, and maintaining a sourdough starter from scratch using only flour and water. You'll learn the specific ratios for a successful culture, how to recognize signs of fermentation, and how to manage your starter's lifecycle so it remains healthy for years.
What Exactly Is a Sourdough Starter?
A sourdough starter is a living culture of wild yeast and lactic acid bacteria captured from the air and the flour itself. Unlike commercial yeast which comes in a packet, this is a fermented mixture that relies on the microorganisms naturally present in your kitchen. It's a living thing. You're essentially building a tiny, edible ecosystem in a glass jar.
The process relies on lactobacilli—the same good bacteria found in yogurt—and wild yeasts. These microbes break down the sugars in the flour, producing carbon dioxide (which makes bread rise) and organic acids (which give sourdough its signature tang). If you've ever wondered why fermented food tastes better, it's because of this complex chemical reaction.
Most people start with a simple ratio of flour and water. You don't need fancy additives or expensive kits. Just high-quality ingredients and a bit of patience.
How Do You Make a Sourdough Starter from Scratch?
To make a sourdough starter, you mix equal parts by weight of flour and water, then feed it once or twice a day for about seven to ten days. The key is consistency and using a scale rather than a measuring cup. Volume is unreliable; weight is absolute.
I recommend using a digital scale like a ThermoPro or a Ozeri kitchen scale to ensure your ratios are exact. If you're using volume, you'll likely end up with a runny mess that won't rise properly.
The Step-by-Step Daily Routine
- Day 1: Mix 50g of whole wheat flour and 50g of filtered water in a clean glass jar. Stir until no dry flour remains.
- Day 2: Discard half of the mixture. Add 50g of all-purpose flour and 50g of water. Stir well.
- Day 3: You might see a few bubbles now. Discard most of the mixture, leaving only about 50g of "starter." Add 50g flour and 50g water.
- Day 4-7: Continue the discard-and-feed process every 24 hours. You're looking for the mixture to start smelling slightly fruity or sour.
Don't get discouraged if nothing happens on day three. It's common for the culture to look "dead" for a few days before the bacteria actually take hold. This is the part where most people quit—don't be one of them.
A quick tip: Use filtered or spring water. Chlorine in tap water can sometimes inhibit the growth of the wild yeast you're trying to cultivate. If you must use tap water, let it sit out on the counter for a few hours to allow the chlorine to dissipate.
What Is the Best Type of Flour to Use?
The best flour for starting a culture is whole grain flour, such as rye or whole wheat, because it contains more nutrients and wild yeast on the grain hulls. Once the culture is established, you can transition to a more refined flour for regular feedings.
While you can use any flour, the nutrient density makes a difference. Rye flour is a powerhouse for starters because it's highly fermentable. If you want to experiment with different textures, look into grain varieties that offer different protein levels.
| Flour Type | Best Use Case | Pros |
|---|---|---|
| Rye Flour | Starting the culture | High nutrient density; speeds up fermentation. |
| Whole Wheat | Early stages | Provides plenty of food for the yeast. |
| Bread Flour | Regular maintenance | High protein for strong gluten structure. |
| All-Purpose | Daily baking | Easy to find and very consistent. |
I usually keep a jar of King Arthur Unbleached All-Purpose Flour in my pantry for daily feedings. It's predictable and easy to work with. If you're using a local mill, check the protein content first—you want something with a bit of "oomph" to support the rise.
How Often Should You Feed Your Sourdough Starter?
The frequency of your feedings depends entirely on whether you keep your starter on the counter or in the refrigerator. A room-temperature starter needs daily feeding, while a refrigerated starter can go a week or more between feedings.
If you bake every day, keep it on the counter. If you only bake on weekends, put it in the fridge. It's a matter of convenience and how much work you want to put in. (I personally prefer the fridge method for busy weeks—it saves so much time.)
Managing the Temperature
Temperature is the one variable you can't always control, but you can influence it. Yeast loves warmth. If your kitchen is cold (like in a Halifax winter), your starter will move much slower. If it's too hot, it might over-ferment and become overly acidic.
- Warmth (75-80°F): Fast fermentation, more frequent feedings needed.
- Room Temp (65-70°F): Steady, predictable growth.
- Cold (Under 40°F): Dormant state; ideal for long-term storage in the fridge.
If your starter isn't bubbling, don't panic. It might just be hungry or cold. Try moving it to a slightly warmer spot—perhaps near a lamp or the top of the refrigerator—to see if it wakes up.
How Do I Know if My Starter is Ready to Bake?
p>Your starter is ready to bake when it reliably doubles in volume within 4 to 8 hours after a feeding. You're looking for a bubbly, aerated texture that looks almost like a thick mousse.
A great way to test readiness is the "float test." Drop a small teaspoon of your active starter into a glass of water. If it floats, the gas-to-weight ratio is high enough that it should lift your bread. If it sinks, it needs more time or more frequent feedings.
Be aware that a starter can sometimes look "ready" but then collapse quickly. This usually means the acidity is getting too high. If it smells like nail polish remover (acetone), it's hungry. Feed it more frequently or use a higher ratio of flour to water to slow it down.
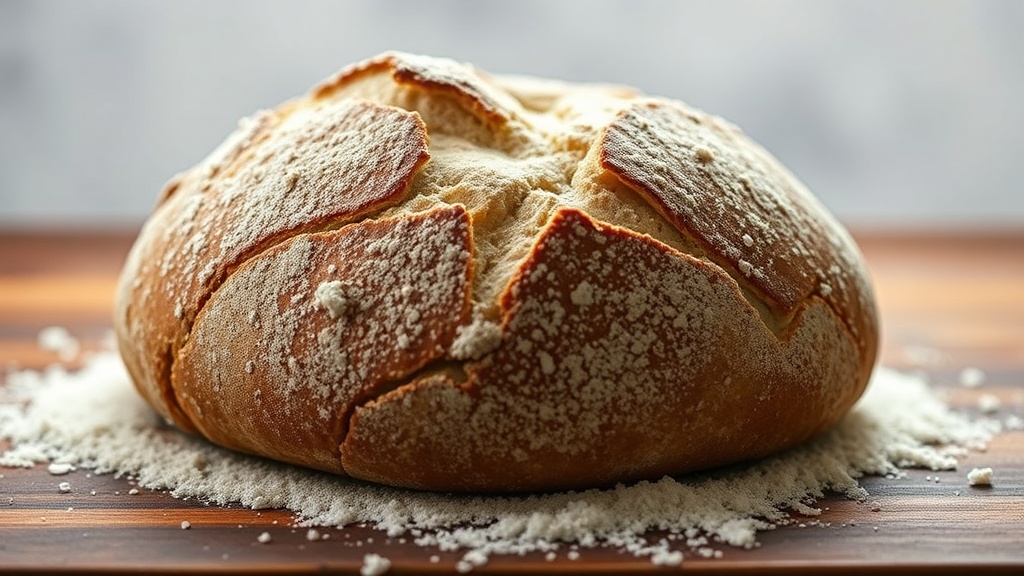
Once you have a stable, active culture, you can start experimenting with different doughs. You might find that certain grains change the flavor profile significantly. For instance, using more rye will result in a denser, more sour loaf, whereas a high-protein bread flour will give you that classic, airy crumb. This is a great way to explore the differences in regional grains and how they impact your baking.
Maintaining a starter is a long-term commitment, but once you get the rhythm down, it becomes second nature. It's just another ingredient in your kitchen toolkit.